 EVE卫浴
EVE卫浴
How Do You Install a Moen Graeden Shower Faucet Yourself in an Afternoon?
浏览次数:322 分类:Install
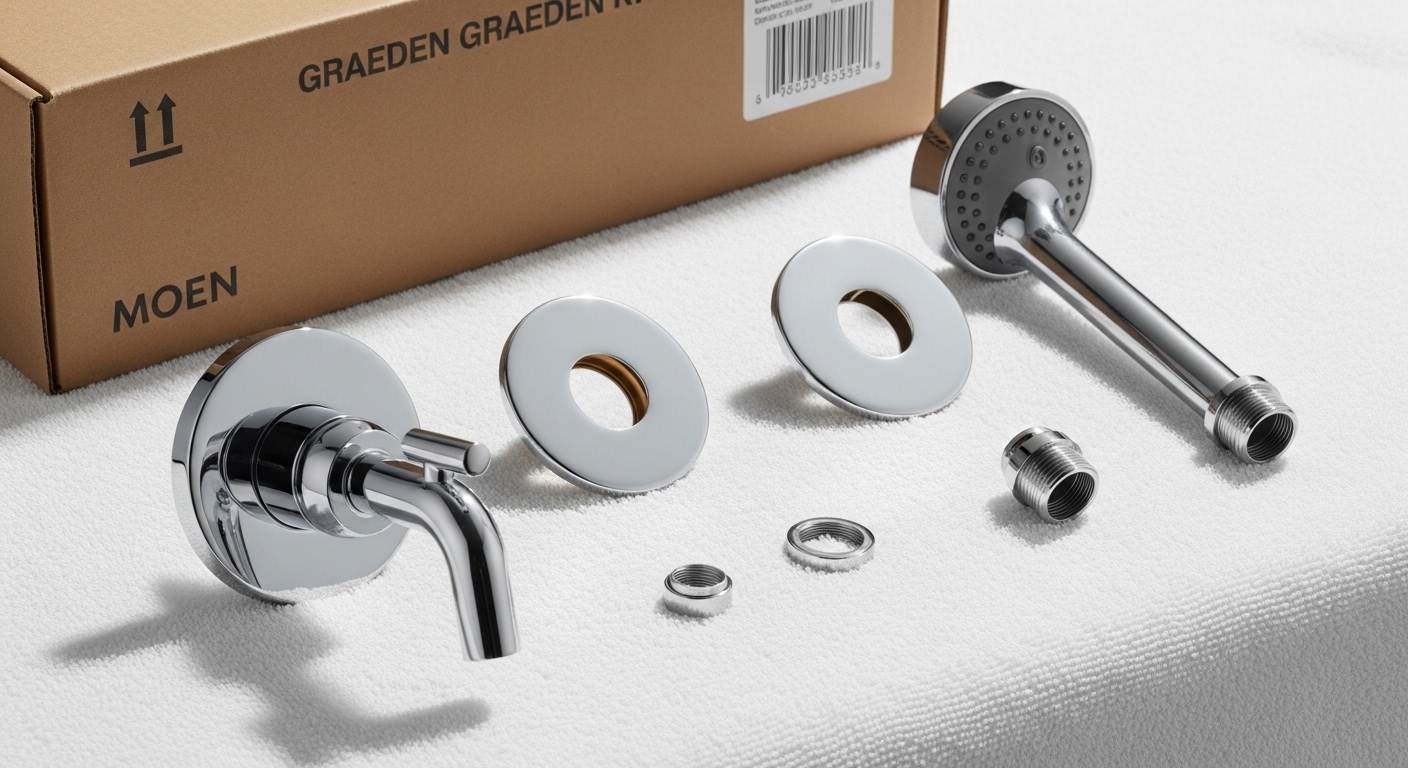
If you’re wondering how to install a Moen Graeden shower faucet, the honest answer is that it’s two different jobs wearing one name. The Graeden is a trim kit — the handle, the round escutcheon plate, and the showerhead you actually see — and it snaps onto a Moen Posi-Temp rough-in valve hidden behind the wall. Which job you’re doing (just the pretty trim, or the whole valve behind the tile) completely changes the tools, the time, and whether you need to open the wall. This guide walks through both, in plain language, so you know exactly what you’re facing before you turn off the water.
What exactly comes in a Moen Graeden shower kit — and what do you need to buy separately?
The Graeden trim kit includes the handle, the escutcheon (the round cover plate), the showerhead, and usually the shower arm and flange. It does not include the valve body — the guts inside the wall. That’s the single most common surprise for first-timers.
Moen sells the Graeden as a trim-only kit because most Moen showers already use a Posi-Temp valve behind the wall. If you have an existing Moen shower, you very likely already have the right valve and only need the trim. If you’re building new or replacing a non-Moen shower, you’ll need to buy the Posi-Temp rough-in valve (Moen part 2520 or the newer equivalent) separately.
- In the box: single-function handle, escutcheon plate, showerhead, shower arm, flange, and a plastic cartridge cap/temperature-limit stop.
- Usually NOT in the box: the Posi-Temp valve body, the 1222 cartridge (comes with the valve, not the trim), plumber’s tape, and plumber’s putty or silicone.
- You supply: Teflon/PTFE tape, silicone caulk, and — if roughing in — copper or PEX supply lines and fittings.
Before you buy anything, look behind your current trim. If you see a round brass valve with “MOEN” and a horseshoe-shaped plastic clip on top, you have a Posi-Temp and the Graeden trim will bolt right on. That five-minute check saves people from returning parts.
Do you need to open the wall to install the Graeden — or is it a swap?
If you’re replacing an existing Moen Posi-Temp trim, you do not need to open the wall — it’s a straight swap you can do from the bathroom side. If there’s no valve behind the wall (new construction or a non-Moen valve), you must access the plumbing, which usually means opening the wall from the back or removing tile.
Here’s the decision in practice:
| Your situation | Open the wall? | Time estimate | Skill level |
|---|---|---|---|
| Replacing old Moen Posi-Temp trim with Graeden trim | No | 30–45 min | Beginner |
| Cartridge worn/leaking, swapping trim at same time | No | 45–75 min | Beginner–intermediate |
| Replacing a non-Moen valve with a Posi-Temp | Yes | 2–4 hrs | Intermediate |
| New construction / bare studs | Wall still open | 2–3 hrs | Intermediate |
The swap-only path is genuinely beginner-friendly — no solder, no glue, no access panel. The full rough-in is where you’re deciding whether to call a pro, because it involves supply connections and getting the valve set at the correct depth for your finished wall. If you’re setting a valve from scratch, the depth matters a lot; getting the shower valve rough-in distance from the finished wall right is the difference between a flush escutcheon and one that won’t seal against the tile.
What tools do you need to install a Moen Graeden shower faucet?
For a trim swap you need almost nothing: a Phillips screwdriver, a hex/Allen key, an adjustable wrench, and plumber’s tape. For a full valve install, add a level, a tubing cutter, and either a soldering torch or PEX crimp tool depending on your pipe.
- Phillips screwdriver — for the handle set screw and mounting.
- Hex/Allen key — the Graeden handle often uses a set screw underneath.
- Adjustable wrench or channel-lock pliers — for the shower arm and cartridge clip.
- PTFE (Teflon) tape — wrap the shower arm threads 4–6 times.
- Silicone caulk — to seal the escutcheon against the wall.
- Moen cartridge puller (1200) — only if you’re replacing the 1222 cartridge; worth the few dollars because a stuck cartridge is miserable without it.
- Level, tubing cutter, torch or PEX crimper — rough-in only.
How do you install the Graeden trim step by step (the no-wall-opening version)?
To install the Graeden trim on an existing Posi-Temp valve: shut off the water, remove the old handle and plate, confirm the 1222 cartridge is in good shape, then mount the new escutcheon and handle and thread on the showerhead. Turn the water back on and test. Here’s the full sequence.
- Shut off the water. Use the bathroom shut-off if you have one, otherwise the main. Open the shower handle afterward to bleed pressure and confirm it’s truly off.
- Remove the old trim. Pop the handle cap, back out the set screw, pull the handle, then unscrew the old escutcheon. You’ll now see the round Posi-Temp valve and the horseshoe clip.
- Inspect the cartridge. If your old shower ran hot/cold unevenly or dripped, replace the 1222 cartridge now — pull the horseshoe clip with pliers, extract the cartridge (a puller tool helps), and seat the new one with the flat side of the stem facing up. This is the moment to fix pressure or temperature problems while everything’s open.
- Set the temperature limit stop. The Graeden includes a plastic stop that limits how hot the water gets. Set it now per the paper template so no one gets scalded — this is a real anti-scald safety feature, not optional trim.
- Mount the new escutcheon. Run a bead of silicone around the back edge (leave a small gap at the bottom so any water behind the wall can drain and you can spot a leak). Screw it to the valve’s mounting posts.
- Install the handle. Slide the Graeden handle onto the stem, tighten the set screw with the hex key, and snap on the cap.
- Fit the shower arm and head. Wrap the arm threads with PTFE tape, thread the arm into the wall drop-ell, wrap the showerhead end, and hand-tighten the head plus a quarter turn with a wrench (protect the finish with a rag).
- Restore water and test. Turn the supply back on slowly, run the shower through hot and cold, and watch the handle base and showerhead for drips for a few minutes.
That’s the whole trim job. Most people who’ve swapped a faucet cartridge before will breeze through it. If your water comes out weak after the swap, it’s almost always the cartridge or the showerhead flow restrictor — the same troubleshooting path covered in our guide on why a Moen faucet has low water pressure and how to fix it.
How do you rough in the Posi-Temp valve if there’s no Moen valve behind the wall?
To rough in a Posi-Temp valve, mount the valve body to a wood cross-brace between the studs at the correct depth, connect hot to the left inlet and cold to the right, run the shower riser up to the arm ell and the tub spout down if applicable, then pressure-test before you close the wall. This is the harder half of the job and where precision pays off.
Key points that trip people up:
- Depth to finished wall. The valve has a molded “plaster ground” ridge that must sit at the plane of your finished tile or surround — not the bare backer board. Too deep and the trim won’t reach; too shallow and the escutcheon stands proud.
- Hot on the left, cold on the right as you face the valve, matching the cartridge orientation. Reversing them makes the handle work backwards.
- Cap the outlets and pressure-test. Before drywall or tile goes up, restore water with the outlets capped and check every joint. Fixing a leak now costs minutes; fixing it after tile costs a weekend.
- Support the valve solidly. A wobbling valve loosens joints over time. Screw it firmly to a brace.
Once the wall is finished, you circle back to the trim steps above. If you’re comfortable soldering copper or crimping PEX and you’ve done supply connections before — say you’ve handled something like a tub spout install yourself — the rough-in is within reach. If not, having a plumber set just the valve and doing the trim yourself is a smart, budget-friendly split.
How much does it cost to install a Moen Graeden shower faucet — DIY vs. plumber?
DIY trim-only runs the price of the kit alone, usually $90–$160, plus a few dollars for tape and silicone. A plumber setting a new Posi-Temp valve and trim typically adds $250–$600 in labor depending on wall access, so doing it yourself saves the most on the rough-in — exactly the part that’s hardest.
| Scenario | Parts | Labor (if hired) | DIY total |
|---|---|---|---|
| Trim swap only | $90–$160 | $120–$200 | ~$95–$170 |
| Cartridge + trim | $110–$185 | $150–$250 | ~$115–$195 |
| New valve + trim (wall open) | $140–$230 | $250–$500 | ~$150–$260 |
| New valve behind finished tile | $140–$230 | $400–$800 | Not recommended for beginners |
The takeaway: if you already have a Posi-Temp valve, DIY is a clear win — low risk, real savings, and about an hour of your time. The moment the job requires opening finished tile, the math and the risk shift toward hiring out at least the valve work.
What finishes and models pair with the Graeden — and how do you keep them looking new?
The Graeden comes in chrome, brushed nickel, and often an oil-rubbed bronze or matte black option, and it matches Moen’s Posi-Temp platform regardless of finish. To keep any finish looking new, wipe it dry after showers and clean only with mild soap and water — never abrasive pads or acidic descalers that eat the coating.
Hard water is the real enemy of a new shower faucet. Mineral crust dulls the showerhead spray and spots the handle within weeks in some regions. A soft cloth and a diluted vinegar soak on the showerhead face (kept off the finish itself) keeps flow strong. If your spray is already suffering from buildup, our walkthrough on cleaning a faucet head from hard water buildup without wrecking the finish applies directly to shower heads too.
FAQ
Is the Moen Graeden trim compatible with older Moen shower valves?
Yes, as long as the existing valve is a Moen Posi-Temp. The Graeden is a Posi-Temp trim kit, so it fits any Posi-Temp rough-in valve made across many years. It will not fit Moen’s Moentrol or 1600-series valves, or another brand’s valve — those use different stems and clips.
Do I need to replace the cartridge when I install the Graeden trim?
Not automatically. If your old shower ran smoothly with no drips or temperature swings, the existing Moen 1222 cartridge is fine to keep. Replace it only if you had leaks, hard-to-turn handles, or hot/cold problems — and since the valve is already exposed during trim install, that’s the ideal time to do it.
Why does my Graeden shower drip after I installed it?
A post-install drip almost always means the cartridge isn’t seated fully or the horseshoe clip isn’t pushed all the way down. Shut off the water, pull the trim, and confirm the 1222 cartridge is flat-side-up and the clip is fully engaged. If the drip continues, the cartridge itself may be worn and should be replaced.
Can I install the Graeden shower faucet without an access panel behind the shower?
Yes, if you’re only doing the trim and the Posi-Temp valve is already in the wall — everything is done from the bathroom side. You only need rear access if you’re setting a new valve or repairing the plumbing behind it, which is why an access panel is worth adding during any wall-open remodel.
How long does the Moen Graeden shower faucet warranty last?
Moen backs its residential faucets, including Posi-Temp trim like the Graeden, with a limited lifetime warranty on finish and function to the original homeowner. Register your purchase and keep the receipt — warranty claims typically require proof of purchase, and DIY installation does not void it as long as the product isn’t damaged during install.
What’s the difference between the Graeden and other Moen shower trims?
The main differences are styling and included options — the Graeden is a value-oriented single-function trim with a clean transitional handle and round escutcheon. Higher lines add features like a wider handle, integrated diverters, or matched tub spouts, but the underlying Posi-Temp valve and installation steps are the same across them.
About the author: This guide was written by the evefaucet fixtures team — bench installers and product specialists who fit, test, and troubleshoot shower valves and trim kits every week. We install faucets to real-world plumbing conditions, not showroom mockups, so the time estimates and gotchas here come from hands-on jobs.
About evefaucet: evefaucet designs and sells faucets, shower systems, and bathroom fixtures built to U.S. plumbing standards. Our shower valves and trim are pressure-tested and meet ASME A112.18.1 / CSA B125.1 requirements for anti-scald pressure-balancing performance, and every fixture ships with clear installation documentation and warranty support. For related help, see our guides on shower valve rough-in distance and Moen vs. Kohler kitchen faucets.