 EVE卫浴
EVE卫浴
What Is an Outdoor Faucet Extender — and Do You Actually Need One for Your Hard-to-Reach Spigot?
浏览次数:283 分类:公司产品
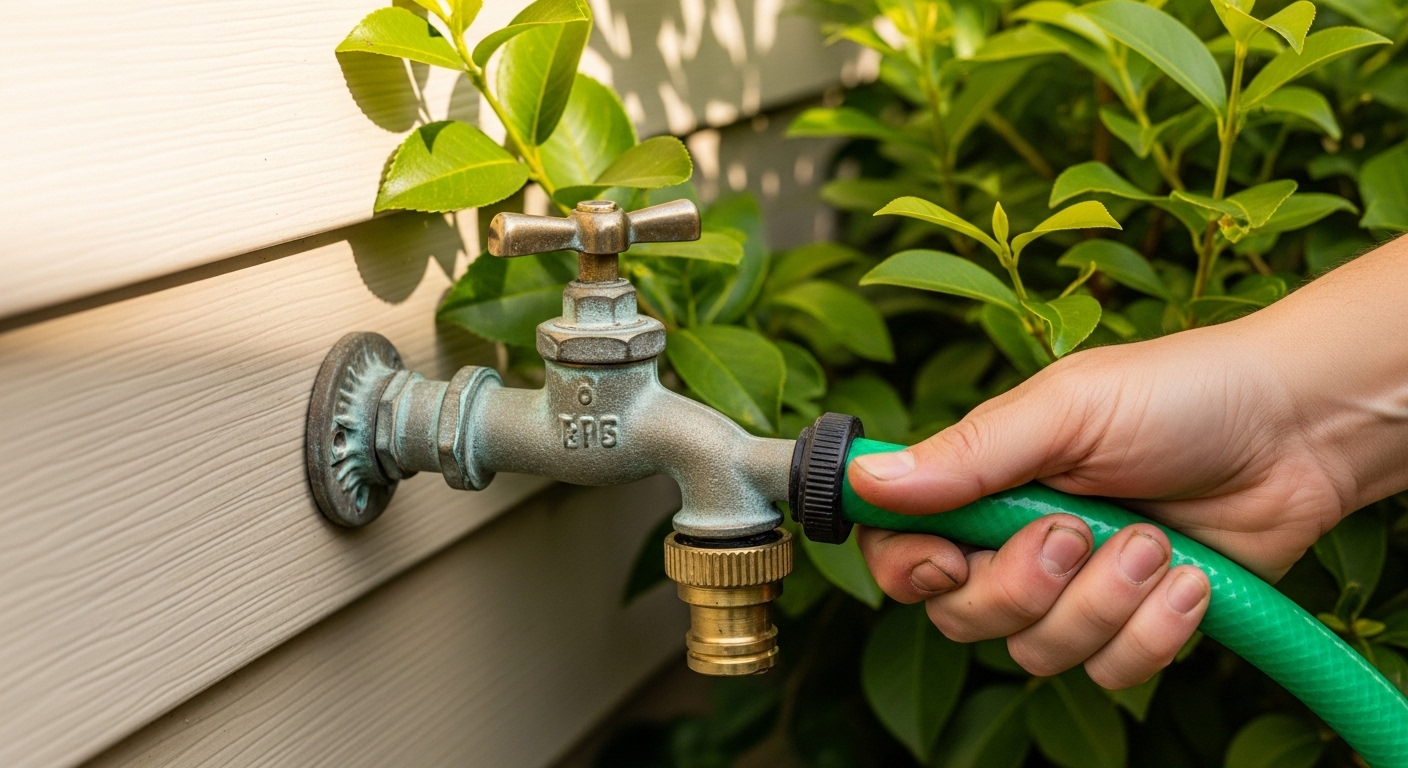
If you’ve ever knelt in the mud, reached behind an overgrown shrub, and fought to thread a garden hose onto a spigot you can barely see, an outdoor faucet extender is the ten-dollar fix you’ve been missing. It’s a simple accessory — usually a rigid brass nipple or a flexible braided line with a female hose thread on one end and a male hose thread on the other — that relocates the working end of your outdoor faucet to somewhere you can actually use it. No plumbing, no shutoff, no pipe dope on the supply side. You just screw it on.
Below, I’ll walk through exactly what an extender does, the different types, how to pick the right length and material, how to install one in about two minutes, and when an extender is the wrong tool and you actually need to move the faucet itself. I’ve installed and tested dozens of these on real houses — vinyl siding, brick, and deck-blocked hose bibs — so this is the practical version, not the spec-sheet version.
What exactly does an outdoor faucet extender do?
An outdoor faucet extender moves the hose connection point of your spigot outward, upward, or to the side — without touching the plumbing inside the wall. In plain terms: it screws onto the threaded tip of your existing outdoor faucet and gives you a new, easier-to-reach place to attach your hose or splitter.
Here’s the key thing people get wrong. There are two different “extenders” on the market, and they solve two different problems:
- Hose-thread extenders — These attach to the spout tip (the 3/4″ garden hose thread, or GHT). They only move the hose connection, not the handle. Perfect when the hose end is jammed against the wall or a deck joist and you can’t get a coupler on.
- Valve-relocation extenders / faucet extension arms — These are longer rigid pipes (often with a mounting bracket) that carry both the outlet and, in some designs, put the whole faucet body out where you can turn the handle. These are for spigots buried behind landscaping or set awkwardly low.
Most people searching for an outdoor faucet extender want the first kind — a cheap, quick fix so a hose or a Y-splitter finally fits. But if the actual handle is what you can’t reach, keep reading, because you need a different product.
Do you really need one, or is there a cheaper fix?
You need an outdoor faucet extender when the connection point — not the pipe itself — is the problem. If you can turn the handle fine but can’t thread a hose on because of the wall, a shrub, or a low deck, an extender solves it for under $15. If you can’t even reach the handle, an extender alone won’t help.
Run through this quick checklist before you buy:
- Can you turn the handle comfortably? If no, you want a valve-relocation extension or a proper faucet move, not a hose-tip extender.
- Is the hose end hitting the wall, deck, or ground when you try to attach it? If yes, a 6–12″ rigid or flexible extender fixes this instantly.
- Do you use a splitter or timer that’s too fat to fit in the gap? An extender gives you clearance so multi-way splitters and hose timers stop knocking against the siding.
- Is the spigot leaking around the handle already? Fix that first — an extender won’t stop a leak. If water weeps from the stem when you open it, that’s a packing issue, and you’ll want to read what outdoor faucet packing is and how to stop a leak around the handle before adding anything to the spout.
One honest note: an extender adds a joint, and every joint is a potential drip. Use a washer with a good seal (more on that below) and it’s a non-issue — but don’t stack three cheap adapters and expect it to stay dry.
What are the different types of outdoor faucet extenders?
There are three main types: rigid brass nipples for short reach, flexible braided lines for going around obstacles, and rigid extension arms for relocating the whole outlet. The right one depends on how far you need to go and what’s in the way.
| Type | Typical length | Best for | Rough price | Downside |
|---|---|---|---|---|
| Rigid brass hose nipple | 3″–6″ | Getting a hose past the wall / deck edge | $6–$12 | Only goes straight out; can’t route around obstacles |
| Flexible braided extension line | 12″–24″ | Snaking around bushes, meters, or corners | $12–$25 | Can kink or sag; lower burst rating than pipe |
| Rigid extension arm w/ bracket | 12″–36″ | Pulling the outlet out from behind landscaping | $20–$45 | Needs mounting; more joints to seal |
| Right-angle / 90° adapter | 2″–3″ | Redirecting a hose that’s pinned against a wall | $5–$10 | Restricts flow slightly at the elbow |
For most homeowners, a rigid brass nipple or a 90° adapter is all you need — cheap, leak-resistant, and no mounting required. Go flexible only when you genuinely need to bend around something the rigid pipe can’t clear. And always choose brass over plastic where the extender threads onto the spigot: plastic hose adapters crack when the temperature swings and are the number-one cause of a slow drip nobody can find.
Brass vs. plastic — does the material really matter outdoors?
Yes, material matters a lot outdoors, and brass wins. Brass handles UV, freeze-thaw cycles, and repeated hose changes without cracking, while plastic gets brittle within a season or two of sun exposure. The one place plastic is acceptable is a temporary summer setup you’ll remove before winter.
If you live where the pipe freezes, this matters even more. A brass extender left on a frost-free (freeze-proof) spigot over winter can actually trap water and defeat the freeze protection — so on a frost-free hydrant, remove any extender, splitter, or hose before the first hard freeze so the sill cock can drain properly.
How do you install an outdoor faucet extender? (Step by step)
Installing an outdoor faucet extender takes about two minutes and one tool. Because it threads onto the existing spout, you don’t shut off the water and you don’t touch the pipe in the wall — you just seal the hose-thread connection with a washer and hand-tighten.
- Turn the faucet off and unscrew anything already on the spout (old hose, splitter, cap).
- Check the washer. The female-thread end of the extender should have a rubber hose washer inside. Make sure it’s seated flat and not torn. A fresh washer is the difference between dry and dripping.
- Thread the extender on by hand, clockwise, onto the 3/4″ garden hose thread. It should start smoothly — if it fights you, back it off and restart so you don’t cross-thread the brass.
- Snug it with pliers or a wrench — about a quarter turn past hand-tight. Don’t crank on it; hose-thread connections seal on the washer, not on metal-to-metal force.
- Attach your hose or splitter to the new outlet end, the same way.
- Turn the water on and watch the joints. If you see weeping at the extender’s base, shut off, replace the washer, and re-snug. Don’t reach for Teflon tape on a hose-thread joint — GHT seals on the washer, and tape usually makes it worse.
That’s it. No soldering, no pipe glue, no shutting off the house. If your extender is the rigid-arm type with a wall bracket, you’ll add two screws into the siding or a stud to support the far end so the weight of a full hose doesn’t torque the joint — but the plumbing part is still just hand-tightening a hose thread.
One place people slip up: Teflon tape belongs on tapered pipe threads (NPT), not on garden hose threads (GHT). If your extender screws onto the spout’s tip and takes a hose on the other end, both ends are GHT — washers only. If you’re ever adapting to actual pipe thread, that’s a different job, closer to what’s involved in a wall mount faucet installation kit, where tapered threads and thread sealant do come into play.
What size and thread do outdoor faucet extenders use?
Almost all outdoor faucet extenders in North America use 3/4″ garden hose thread (GHT) — the same standard as your garden hose, splitter, and nozzle. So an extender that says “3/4 GHT” or “fits standard garden hose” will match a standard U.S. hose bib. The catch: GHT is not the same as 3/4″ pipe thread, even though the numbers match.
Here’s the quick reference so you buy the right thing:
- 3/4″ GHT (garden hose thread): The threads on your spigot’s spout tip and on both ends of a typical extender. Straight threads, sealed by a washer. This is what you want 95% of the time.
- 3/4″ or 1/2″ NPT (national pipe thread): Tapered threads found where the faucet screws into the wall pipe — not where the hose attaches. You only deal with this if you’re replacing the faucet body itself.
- Metric threads: Some imported or older fixtures use metric. If a “standard” extender won’t start cleanly, don’t force it — measure or take the part to the store.
If you’re shopping and the language is throwing you off — say you’re buying in a bilingual market or reading an imported label — it helps to know the vocabulary. We broke down what an outdoor faucet is called in Spanish and which word to use when shopping, which is genuinely useful at the hardware counter.
When is an extender the wrong fix — and you should move the faucet instead?
An extender is the wrong fix when the problem is the valve, not the connection. If you can’t reach the handle, the spigot leaks from the stem, or it’s mounted so low that no reasonable extension makes it usable, you should relocate or replace the faucet — not band-aid it with adapters.
Specifically, skip the extender and call a plan-B when:
- The handle is unreachable. A hose-tip extender moves the outlet, not the handle. You’d need a rigid extension arm that carries the whole outlet forward, or a relocated faucet.
- It drips from the stem or handle. That’s a packing or washer problem inside the valve. Adding an extender just moves the leak’s exit point. Fix the valve first.
- You want it permanently in a better spot. If the spigot is on the wrong side of the house or too close to the ground, a proper relocation (or adding a second hose bib) is cleaner and won’t leave a two-foot lever of pipe hanging off your wall.
- Water pressure is already weak. Every added foot and every elbow costs you a little flow. If pressure is marginal, diagnose that before adding restriction — the same troubleshooting logic applies as when only one side of an indoor faucet runs weak.
Think of an extender as a reach-and-clearance tool, not a repair. It’s brilliant at making an otherwise-fine spigot usable. It’s useless at fixing a spigot that’s actually broken.
How do you keep an extender from leaking or clogging over time?
Keep an extender leak-free by replacing the rubber washer once a season and never over-tightening the brass. Keep it from clogging by unscrewing it a couple of times a year and clearing any mineral grit or debris — the same hard-water buildup that clogs indoor aerators collects in outdoor fittings too.
A quick maintenance routine that takes five minutes each spring:
- Unscrew the extender and inspect the washers on both ends. Swap any that are flat, cracked, or torn — a $2 bag of hose washers lasts years.
- Look inside the fitting for white mineral crust. If you see buildup, soak the brass part in white vinegar for 20–30 minutes and rinse. The same trick that works on a scaled-up shower head works here — we covered the method in how to clean a faucet head with vinegar and baking soda.
- Re-thread by hand, snug a quarter turn, and test under pressure.
- Before winter, if you’re on a frost-free spigot, remove the extender entirely so the sill cock can drain.
Do that and a good brass extender will outlast several hoses.
FAQ
Will an outdoor faucet extender reduce my water pressure?
Barely, if at all, with a short rigid extender — you might lose a fraction of a PSI across a straight brass nipple, which you’ll never notice with a garden hose. A long flexible line or a 90° elbow costs slightly more because of the added length and the bend, but it’s still minor. If your pressure is already weak, the extender isn’t the cause; look upstream at the valve or supply.
Can I leave an outdoor faucet extender on over the winter?
Only on a standard (non-frost-free) spigot that you shut off and drain from an interior valve. On a frost-free / freeze-proof hose bib, remove the extender before the first hard freeze — leaving it on traps water in the spout and can defeat the freeze protection, leading to a burst pipe inside the wall.
Do I need Teflon tape or plumber’s tape on an outdoor faucet extender?
No. Garden hose thread connections seal with a rubber washer, not with tape. Teflon tape on GHT usually causes leaks rather than preventing them. Just make sure the washer is intact, hand-thread it on, and snug it a quarter turn with pliers. Save the tape for tapered pipe threads (NPT).
What’s the difference between a hose extender and a faucet extension arm?
A hose extender is a short adapter that moves only the hose connection point outward — cheap, no mounting, screws right on. A faucet extension arm is a longer rigid pipe, usually with a wall bracket, that carries the whole outlet (and sometimes the handle access) away from an obstructed spigot. Choose the hose extender for clearance problems and the arm for reach problems.
Can I stack a splitter and a timer on an extender?
Yes, and that’s one of the best reasons to use one. Bulky Y-splitters and battery hose timers often won’t fit in the tight gap between spigot and wall. A 4–6″ extender gives them room to hang straight without knocking the siding or cross-loading the threads. Just keep the total weight in mind — support a heavy stack so it doesn’t torque the connection over time.
My extender drips right where it meets the spigot. How do I fix it?
Nine times out of ten it’s the washer. Shut the water off, unthread the extender, and check the rubber washer inside the female end — replace it if it’s flat, cracked, or missing. Reseat it flat, hand-thread the extender back on without cross-threading, and snug a quarter turn past hand-tight. If it still weeps, the spout tip’s threads may be damaged, which is a faucet issue rather than an extender issue.
The bottom line
An outdoor faucet extender is one of the highest-value, lowest-effort upgrades you can make to an outdoor spigot. For the price of a sandwich, it turns a knuckle-scraping, hose-fighting chore into a two-second connection — as long as you match the type to your actual problem (clearance vs. reach), choose brass, seal with a good washer, and pull it off before winter on a frost-free bib. If the real issue is a hard-to-turn handle or a leak, an extender won’t save you; fix the valve first, then extend.
Author note: This guide was written by the evefaucet product team, drawing on hands-on installs across vinyl-sided, brick, and deck-obstructed hose bibs in freeze-prone and mild climates alike. About evefaucet: we design and sell faucets, shower systems, and bath and outdoor fixtures direct to homeowners, and every brass fitting we ship is tested to standard hose-thread (GHT) tolerances and pressure-rated for potable-water use. Our brass extenders and outdoor accessories are backed by a manufacturer warranty against defects — if a fitting fails under normal use, we replace it.