 EVE卫浴
EVE卫浴
How Do You Handle Pot Filler Faucet Removal Yourself Without Flooding the Kitchen?
浏览次数:669 分类:公司产品
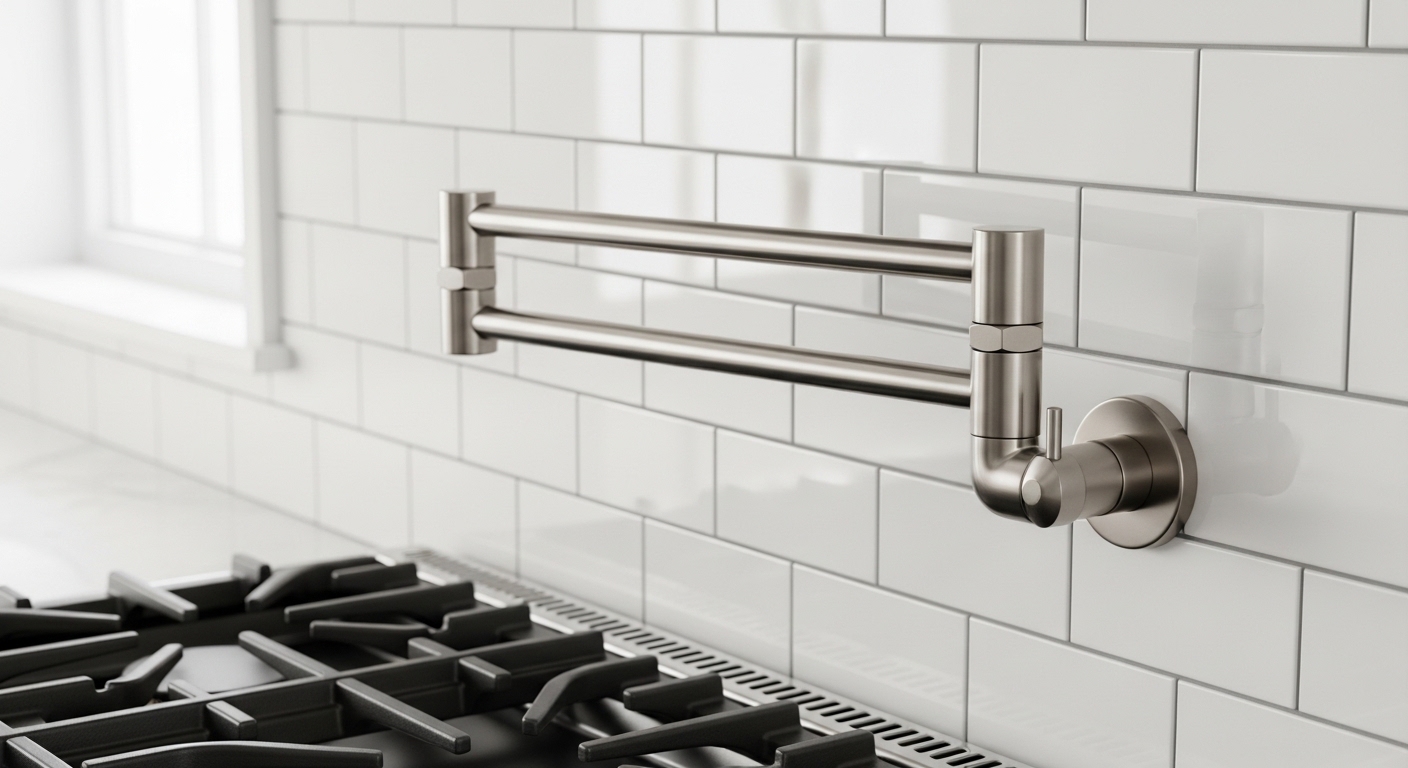
If you’re tackling a pot filler faucet removal because the joint is dripping, the finish has corroded, or you’re renovating the backsplash behind your range, the good news is this is one of the more forgiving wall-mounted faucet jobs. A pot filler carries cold water only, sees low use, and almost always connects to a single dedicated supply line — so there’s no hot side, no mixing valve, and no sprayer hose to fight. The whole thing comes down to killing the water, relieving the pressure, and backing out a couple of threaded connections without cracking the drywall or tile around it.
Below I’ll walk you through exactly how to remove one safely, what tools you actually need, how to tell whether your model unscrews or unbolts, and the two situations where you really should stop and call a pro. I’ll also cover what to do with the open pipe afterward — because that’s where most people either flood the wall cavity or leave a leak waiting to happen.
Do You Need a Plumber to Remove a Pot Filler Faucet, or Can You Do It Yourself?
You can almost always do it yourself. A standard pot filler mounts to a threaded stub-out or a wall bracket and connects with a compression or union fitting — both are hand-and-wrench jobs, not soldering jobs. As long as you have a working shut-off valve and the arm isn’t seized to the wall pipe by corrosion, this is a beginner-friendly removal.
There are really only two cases where DIY stops making sense. First, if your pot filler is hard-plumbed directly to a copper stub with no union or shut-off — meaning the line is soldered right up to the valve — you’ll need to cut and cap the pipe, which is a plumber’s call unless you’re comfortable with copper. Second, if the dedicated shut-off behind the wall is frozen, painted over, or leaking when you touch it, don’t force it; a snapped valve stem inside the wall turns a 30-minute job into an emergency. If either of those describes your setup, it’s worth having a plumber handle the disconnect and cap.
For everyone else — the vast majority of installs done in the last 15 years — the parts are designed to come apart. Manufacturers spec these connections to be serviceable precisely so the faucet can be swapped without opening the wall.
What Tools and Prep Do You Need Before You Start?
You need surprisingly little: an adjustable wrench (or a 1-inch/25 mm one), channel-lock pliers, a towel, a small bucket, and plumber’s tape if you plan to cap or reconnect anything. That’s the core kit. Everything else is situational.
Here’s the full prep checklist before you touch a single fitting:
- Locate the shut-off. Most pot fillers have a dedicated quarter-turn valve inside the wall behind an access panel, in the cabinet next to the range, or in the basement/crawlspace directly below. If you can’t find a dedicated one, you’ll shut off the whole house at the main.
- Adjustable wrench + a second wrench. You want to hold the fixed nut steady while you turn the union — one wrench alone will twist the pipe inside the wall.
- Channel-lock pliers for the mounting flange or escutcheon collar.
- A towel and a bucket — even a “drained” pot filler holds a few ounces of water in the arm.
- Painter’s tape and a rag to protect the tile or backsplash finish while you work.
- A pipe cap or plug (½-inch NPT is the common thread) if you’re removing the faucet permanently and not replacing it.
- A phone camera. Photograph the connection before you take it apart — it’s your reference for reassembly or for buying the right replacement.
If you’ve ever handled a wall-mounted install, this kit will feel familiar. It’s the same basic toolset covered in our guide to what’s inside a wall mount faucet installation kit, just used in reverse.
How Do You Actually Remove a Wall-Mounted Pot Filler Step by Step?
Shut off the water, drain the arm, disconnect the supply union, then unscrew the mounting flange from the wall — in that order. Skipping the drain step is the classic mistake that soaks the cabinet and wall. Here’s the full sequence:
- Close the dedicated shut-off valve. Turn the quarter-turn lever perpendicular to the pipe (or clockwise on a round handle until snug). If you’re using the main, shut it fully.
- Open both joints of the pot filler over the sink or a bucket. A pot filler has two swivel joints and its own tap — opening the tap and folding the arm down relieves pressure and empties the water sitting in the tube. Let it dribble out completely.
- Place a towel and bucket under the wall connection. There’s always a little residual water where the arm meets the supply line.
- Loosen the supply union or compression nut. Put your back-up wrench on the fixed body and turn the union nut counterclockwise with the other. If it’s a compression fitting, the ferrule may stay on the pipe — that’s fine.
- Separate the arm from the supply line. Once the nut is free, gently pull the faucet body straight off. Catch any trickle in the bucket.
- Remove the mounting flange or escutcheon. Some pot fillers thread onto a wall stub and the decorative flange spins off by hand; others bolt to a mounting bracket with two or three screws hidden under the escutcheon cap. Back those out and the faucet is free.
- Deal with the open pipe. If you’re replacing the faucet right away, leave the shut-off closed and move to install. If you’re removing it for good, thread a ½-inch NPT cap onto the stub with plumber’s tape, then slowly reopen the valve to test the cap for leaks before you close up the wall.
That’s it. The single most important habit here is the two-wrench rule — one wrench holds, the other turns. Torquing a wall fitting with a single wrench transfers all that force to the pipe joint inside the cavity, and a cracked joint you can’t see is exactly the kind of slow leak that rots a stud months later. If you notice dripping right at the wall base after reconnecting, the same base-leak diagnosis logic in our piece on a kitchen faucet leaking at the base applies here too.
Deck-Mount vs. Wall-Mount Pot Filler Removal: What’s the Difference?
Wall-mount pot fillers disconnect at a single in-wall supply and unscrew from the wall; deck-mount (counter or backsplash-shelf) models disconnect underneath the counter and pull up through the mounting hole. The wall version is the common one — deck-mount pot fillers are rare and usually found on commercial ranges or freestanding cooking islands.
Here’s how the two compare when it comes time to take one out:
| Factor | Wall-Mount Pot Filler | Deck-Mount Pot Filler |
|---|---|---|
| Where it connects | Single cold line inside the wall behind the range | Cold line under the counter, up through a drilled hole |
| Shut-off location | In-wall access panel, adjacent cabinet, or below | Under-counter stop valve, like a normal faucet |
| Removal difficulty | Easy — one union, one flange | Easy to moderate — mounting nut under counter |
| Wall/counter repair after | Cap pipe, patch or tile over the flange hole | Plug the deck hole or install a hole cover |
| Typical time | 30–45 minutes | 30–60 minutes |
Removing a deck-mount version feels a lot like pulling any standard sink faucet: you reach under the counter, loosen the mounting nut, disconnect the supply, and lift the body out through the hole. The wall version is arguably simpler because there’s nothing to reach around blind — everything happens at eye level once you’ve killed the water.
What Do You Do With the Open Pipe After You Remove the Faucet?
If you’re replacing the pot filler, do nothing to the pipe — just install the new one onto the same stub or bracket. If you’re removing it permanently, cap the ½-inch NPT stub with plumber’s tape and a brass or stainless cap, pressure-test it, and only then patch the wall. Leaving a live, uncapped pipe behind a sealed wall is how you get a hidden flood.
A few real-world scenarios and what each calls for:
- Swapping to a new pot filler: Keep the water off, transfer any old plumber’s tape off the threads, wrap fresh tape, and thread the new faucet on. Same footprint, same hole — no drywall work.
- Removing it and tiling over: Cap the pipe, reopen the valve to confirm the cap holds for at least 10–15 minutes, then close the wall. Consider leaving the shut-off valve accessible behind a small panel in case you ever want the pot filler back.
- Upgrading the whole look: If you’re changing finishes across the kitchen, a pot filler removal is often the moment people rethink the range wall entirely. If you’re leaning toward a bolder look, our take on whether a wall mount faucet in black is worth it walks through how matte and dark finishes hold up in a hard-working cooking zone.
One caution: never cap a pipe and immediately drywall over it without a pressure test. A cap threaded on without tape, or cross-threaded even slightly, can weep for weeks before it shows on the surface. Fifteen minutes of watching a capped stub under full pressure is cheap insurance.
How Do You Avoid Damaging the Tile or Wall During Removal?
Support the faucet’s weight as you loosen the last fitting, and never pry the flange off the wall — unscrew it. Most tile and drywall damage during pot filler removal comes from letting the heavy arm drop suddenly or from prying at a flange that’s actually still threaded on. Tape off the tile edges, keep steady pressure, and let the threads do the work.
A pot filler arm is heavier than it looks — solid brass under the finish. When the supply union comes free, that weight wants to swing down and can chip a tile edge or gouge the backsplash. Hold the body with one hand as you break the last connection. And if the decorative flange won’t spin, look under it for hidden set screws or a bracket before you assume it’s stuck; forcing a flange that’s secretly bolted on is how people crack tile.
Is It Worth Removing a Pot Filler Yourself vs. Replacing It?
If the faucet body is sound and only a joint is leaking, removal for a rebuild or reseal is worth it; if the finish is corroded or the internal cartridge is failing, remove and replace rather than repair. A pot filler’s swivel joints use O-rings and small washers that dry out over years of low use — those are cheap to replace, but a pitted finish or a cracked casting isn’t worth chasing.
The economics are simple: the removal labor is identical whether you’re rebuilding or replacing, so the deciding factor is the condition of the body. Sound body, bad seal → remove, reseal, reinstall. Corroded or cracked body → remove and put in a new one. Either way, you’ve already done the hard part by getting it off the wall cleanly.
FAQ
How do you shut off the water to just a pot filler?
Look for a dedicated quarter-turn valve behind an access panel near the range, in the adjacent cabinet, or in the basement/crawlspace directly below the faucet. Turning the lever perpendicular to the pipe closes it. If your installer didn’t add a dedicated stop, you’ll have to shut off the home’s main supply for the duration of the removal.
Do I need to turn off the main water supply to remove a pot filler?
Only if there’s no dedicated shut-off valve for the pot filler line. Most modern installs include a local stop so you can isolate just the range wall. If yours doesn’t, close the main, then open a faucet on a lower floor to relieve system pressure before you disconnect anything.
What size cap do I need for a pot filler pipe?
Most residential pot fillers connect to a ½-inch NPT (National Pipe Thread) stub, so a ½-inch threaded brass or stainless cap fits the majority of installs. Confirm by measuring your stub or checking the removed faucet’s inlet threads. Always wrap the male threads with plumber’s tape and pressure-test the cap before sealing the wall.
Can I remove a pot filler without opening the wall?
Yes, in almost every case. The faucet unthreads or unbolts from the wall face and disconnects at a union or compression fitting you can reach from outside the wall. You’d only need to open the wall if the line is soldered with no union, or if a hidden fitting is leaking and needs to be replaced.
Why is my pot filler dripping after I reinstalled it?
The most common causes are missing or old plumber’s tape on the supply threads, an over- or under-tightened union nut, or a worn O-ring in one of the swivel joints. Shut the water back off, back the fitting apart, apply fresh tape, and reseat it with the two-wrench method. If the drip is at a swivel joint rather than the wall, replace that joint’s O-ring.
How long does pot filler faucet removal usually take?
Plan on 30 to 60 minutes for a straightforward wall-mount removal, including shutting off the water, draining the arm, disconnecting, and either capping or prepping for a new faucet. Add time if the shut-off is hard to reach or the fittings are corroded and need penetrating oil and patience.
A Note on Sourcing and Standards
When you do reinstall or replace a pot filler, the connection standards matter. Reputable pot fillers are built to ASME A112.18.1/CSA B125.1 for faucet performance and use standard ½-inch NPT inlets so they interchange cleanly with existing supply stubs — that’s a big part of why removal and replacement is so painless. Look for a lead-free brass body compliant with the U.S. Safe Drinking Water Act, and check that swivel-joint O-rings are a serviceable, replaceable part rather than a sealed assembly, so you can rebuild rather than replace down the road.
About the author: This guide was written by the evefaucet product team, who spend their days specifying, bench-testing, and installing kitchen and bath fixtures. We’ve pulled, capped, and reinstalled more pot fillers than we can count — on tile, drywall, and stone — and the steps here reflect what actually works on real range walls, not just the paper instructions.
About evefaucet: evefaucet designs and sells kitchen and bathroom faucets and fixtures direct to homeowners at www.evefaucet.com, with an in-house focus on serviceable, standards-compliant hardware. Our pot fillers and wall-mount faucets ship with the mounting hardware and a limited warranty covering finish and function, and our support team can help you match a replacement to your existing wall stub if you’re removing an older model.